Canvas and Design Frame
The canvas is the at the center stage of the designer window. The canvas can be zoomed and panned infinitely, offering great freedom in organizing objects on canvas. In this section, we will learn how to navigate and zoom on the canvas, as well as manipulating objects on canvas. Additionally, we will learn how to define the export area using "design frame".
Canvas Zoom/Pan
When you first open design window, the default zoom level will be set to Zoom to fit.

To zoom in or out,
Mouse: Hold down Ctrl key on Windows or ⌘ key on Mac, and scroll the mouse wheel up to zoom in, or down to zoom out.
Touch device: Pinch two fingers together to zoom out or stretch two fingers apart to zoom in.
To pan the canvas around,
Mouse: Move mouse around while holding middle mouse button.
Touch device: Swipe in any direction with two fingers.
Object Selection
Click on the object to select it. For shape objects with no fill, you need to click on object boundary to select it. With objects selected, you can move them around the canvas by dragging it. There are several ways to select multiple objects.
- Holding and dragging the mouse will make a rectangle selection, where objects falls fully inside the the rectangle will be selected;
- Clicking on an object, while holding Shift key, will add the object to the current selection;
- Ctrl-A (or ⌘-A on Mac) will select all objects on canvas.
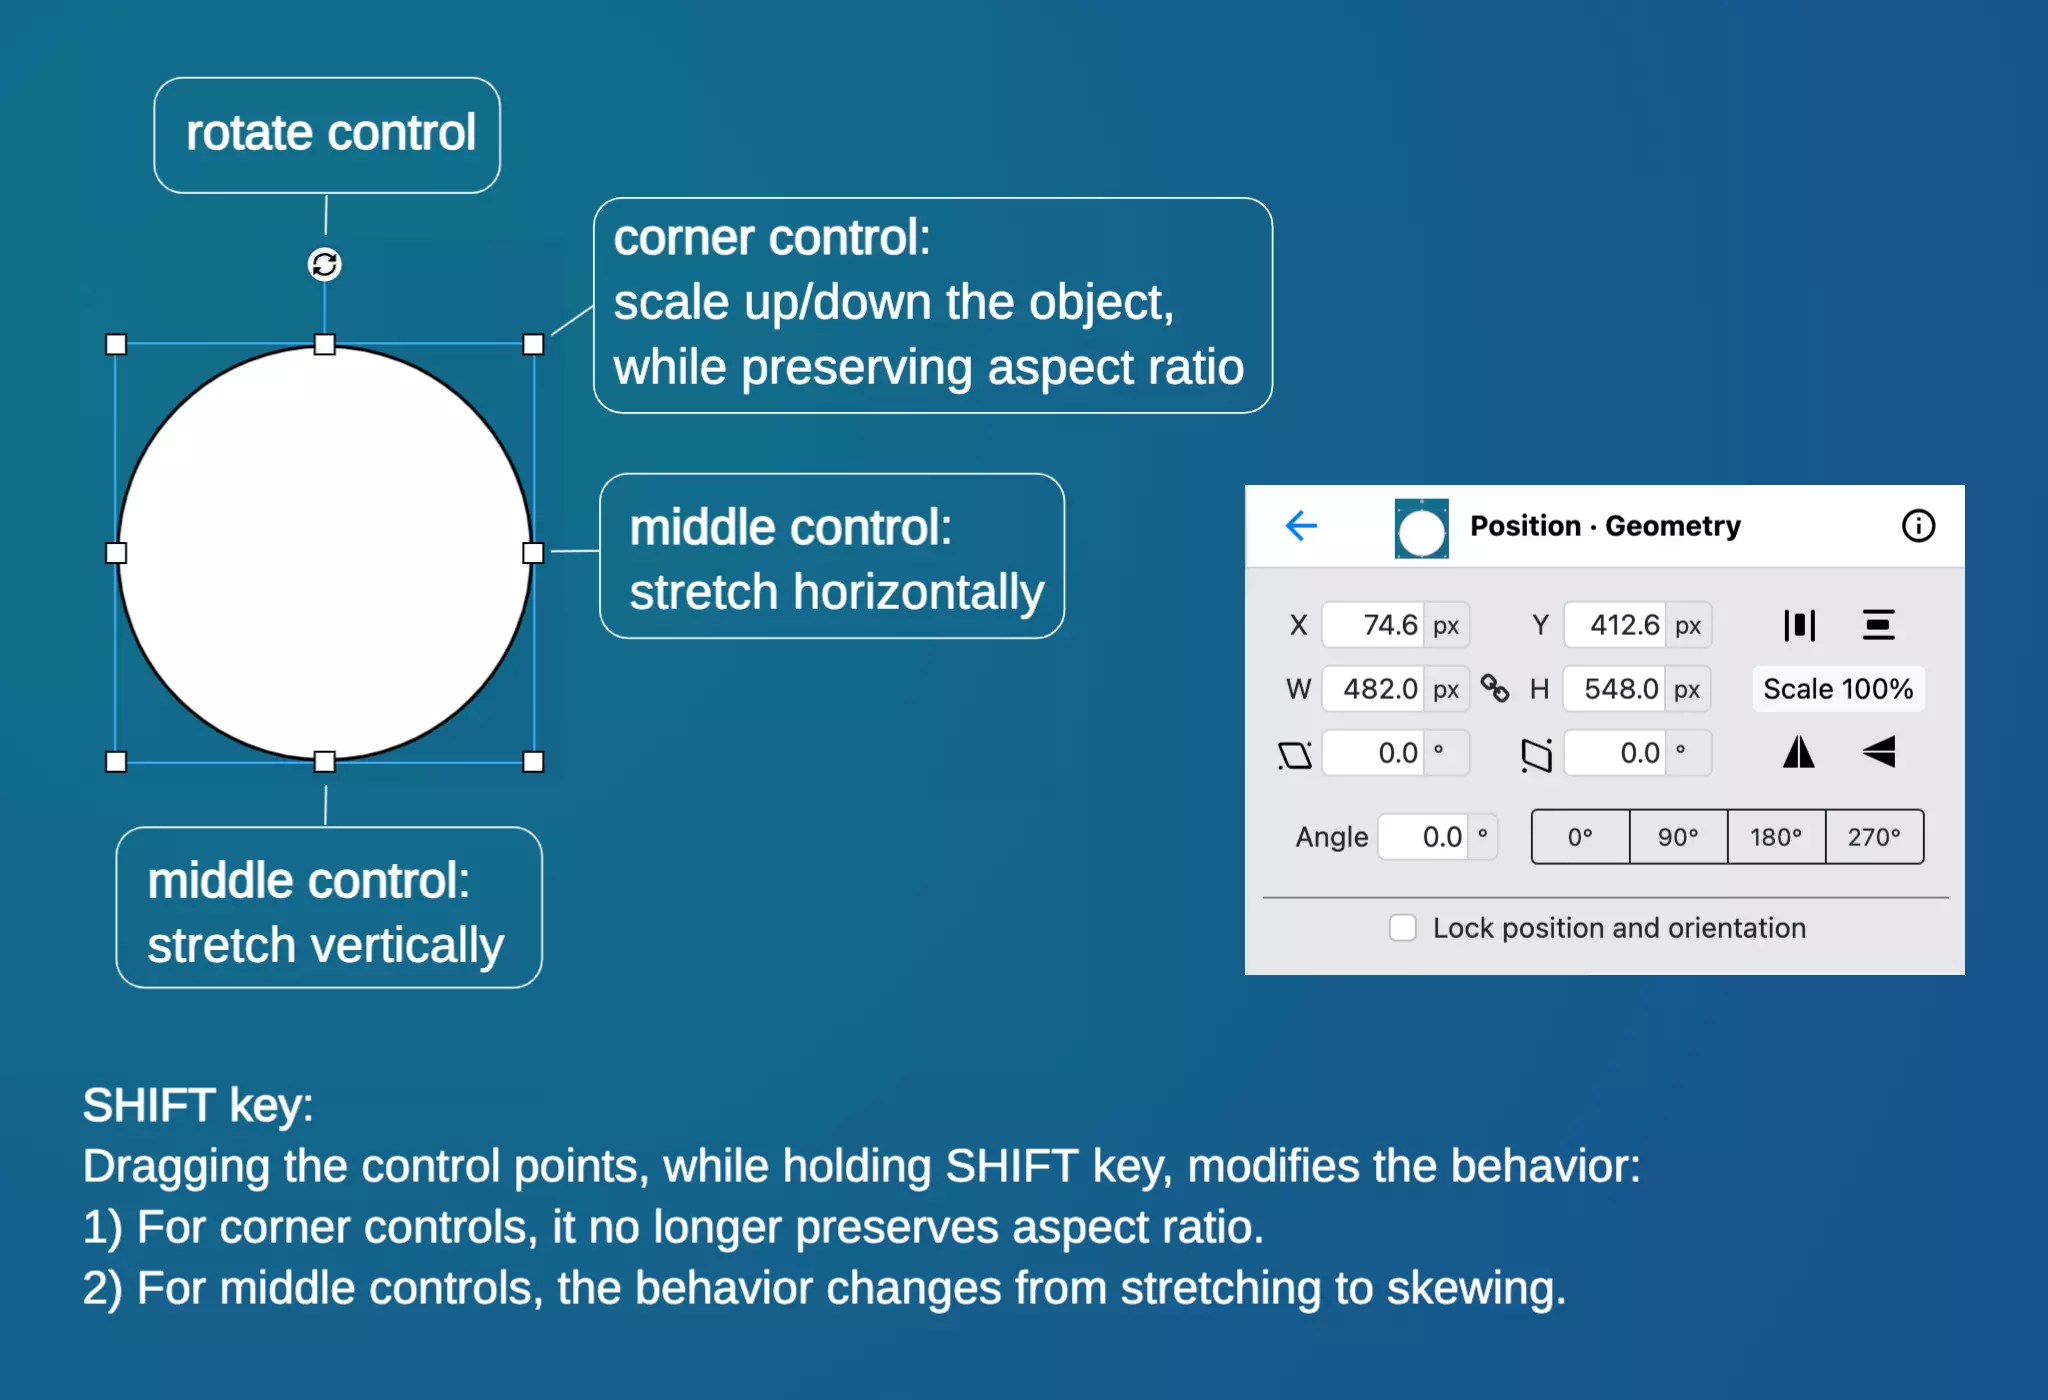
When object(s) are selected, a set of contols is shown around the objects, as shown in the figure below. By dragging these controls, you can rotate, scale, stretch and skew the selected object(s).
![]() When an object's aspect ratio is locked, the middle button does not show. To unlock the aspect ratio, you can change it by clicking button in the action panel.
When an object's aspect ratio is locked, the middle button does not show. To unlock the aspect ratio, you can change it by clicking button in the action panel.
Object Copy/Paste
| Windows | Mac | |
|---|---|---|
| Cut | Ctrl-X | ⌘-X |
| Copy | Ctrl-C | ⌘-C |
| Paste | Ctrl-V | ⌘-V |
| Delete | Delete/Backspace | |
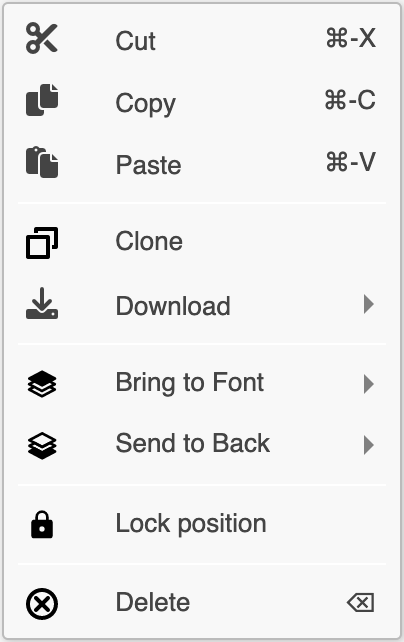
Object Context Menu
On computer, right click on an object to trigger the context menu. On touch devices, long press an object to show context menu.
Design Frame
Design frame is the area of rendering when exporting the design to image or SVG graphics. It is shown as a blue rectangle on canvas.
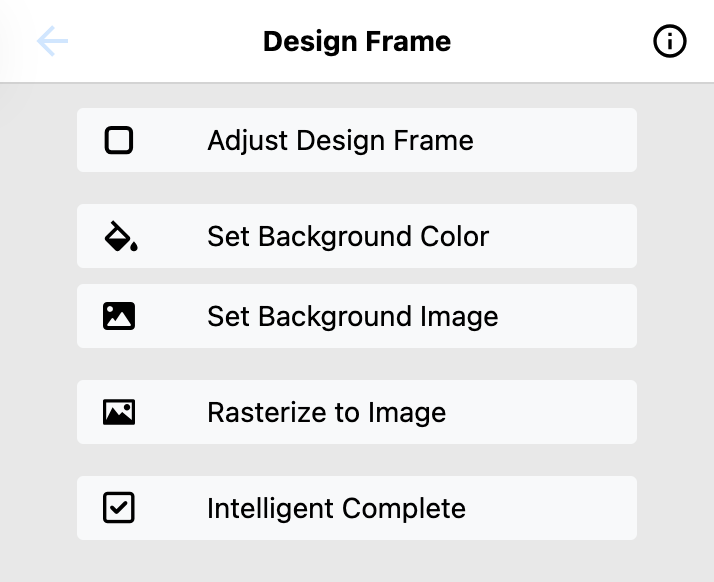
- Its size and position can be adjusted, with button .
- The design frame can be assigned a background color or background image, through buttons and .
- : After laying out the basic elements in the design, you can let AI to automatically compose the rest of the design by clicking on this button. It will fill in the empty region of the design coherent with the rest of the elements.
The feature enables you to finish the design after laying out essential elements of your design. It intelligently fills in the empty areas of the design to ensure coherence with the existing elements.